Overview
If you are hosting a WordPress website with Amazon, either through AWS Lightsail or AWS EC2 you will sleep better at night with a more robust database solution than a local MySQL database running on your web server instance.
This How To post will walk you through setting up an AWS RDS instance to host a MySQL database for your WordPress website. Future posts will cover how to go about connecting this instance to your website.
Getting Started
If you aren't yet familiar with the basics of AWS read my post, “Go Play in the Cloud, Get Started with Amazon Web Services”. It is a quick intro to AWS and offers resources on getting started. With that out of the way it is time to start setting up your RDS instance.
Choosing between MySQL and Aurora
The first choice you have to make in setting up your database is a selection between MySQL and Amazon's MySQL compatible database engine, Aurora. Read up on a side by side comparison of MySQL and Aurora in my article “AWS Aurora vs. MySQL: Side by Side Comparison” It will help you decide which solution is right for you.
For this walk through I will be selecting a MySQL instance.
Step One: RDS Console
From the AWS Services list, choose RDS to bring up the RDS Console

Select Database Engine Type
Select the “Instances” link and click the “Launch DB Instance” button.

Select MySQL and click the Next button.
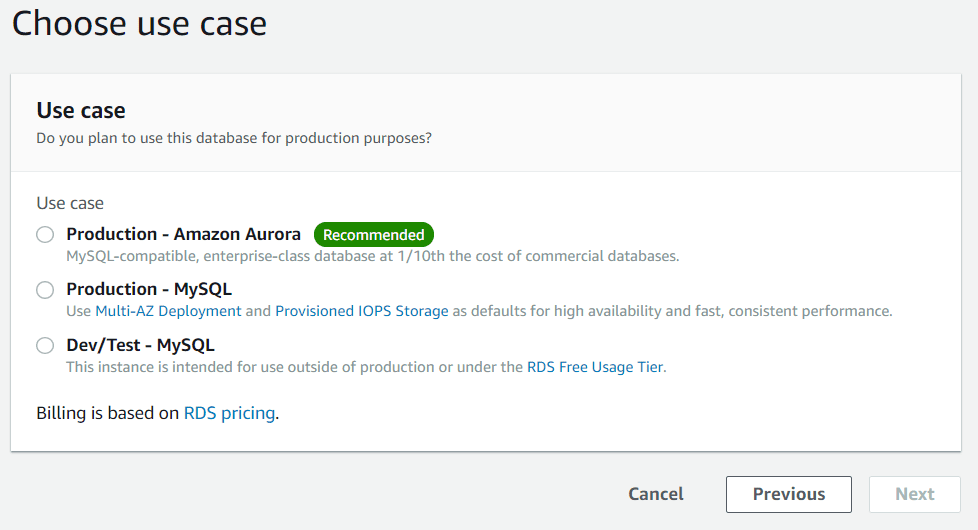
Choose your Use Case
Next you need to choose whether or not this database will be used for production purposes. In this walk through I will be using a non-production setup. You should select the option that is appropriate for your use case.
Select Instance Class
Next, select the Instance Class from the drop down on the Specify DB details page. I've chosen the smallest instance type for demonstration purposes. Each instance increase will be progressively more expensive per hour. Choose accordingly.

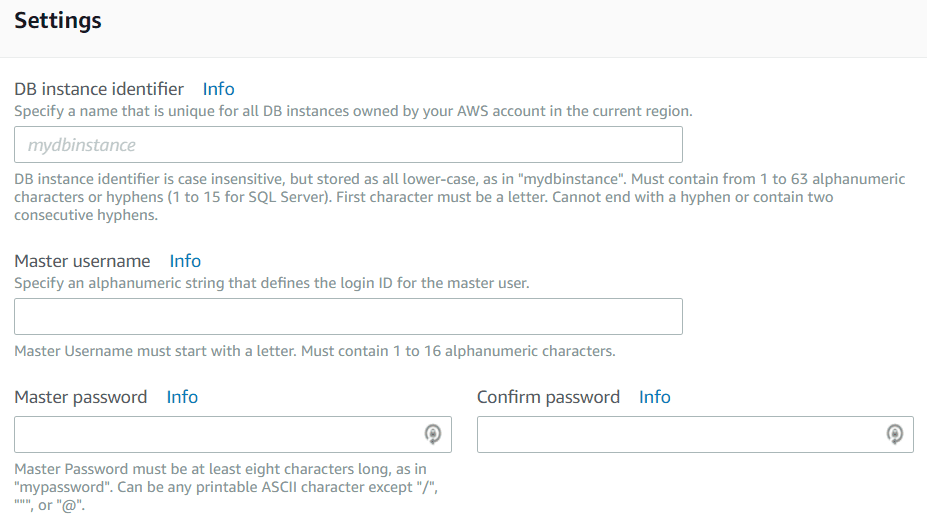
Set Up Instance Details
Now you will enter a DB instance identifier, a master user name, and a password for the master user. Enter the values you would like to use in these fields and click the Next button.
Advanced Settings
In the Advanced Settings step you will start with setting up network security. Choose the option to create a new VPC and a new BB Subnet group.

Choose Public Accessibility
In order to connect to the database with client tools choose the radio button to enable public accessibility. If you do not plan on connecting to the database directly you can choose to leave the database inaccessible.

Enter Database Info
You now need to enter a Database Name for your database. Enter a name appropriate and descriptive for you. For example: wordpress-hub.

Accept the Defaults
The rest of the default settings are fine for this set up. Accept them and click the Launch DB Instance button.
All Done!
It will take a few minutes for your RDS instance and database to be available for you to start using but at this point you are finished with the setup. You can now use this database to back your WordPress websites hosted on either AWS Lightsail or AWS EC2.
In an upcoming post I will walk you through how to connect this database to your WordPress website.
Homework
Now it's your turn. Go out there and get started building your database on AWS RDS. In the comments below post your results. If you get stuck tweet me at @natfyi.
If you'd like a personal consultation you can book a thirty minute session with me via my online calendar.
If you haven't done it yet, go ahead and sign up for my mailing list below. That way, you will get the latest posts delivered right to your inbox as soon as they come out as well as special installments available only to email subscribers.

